Check for Plugin Conflicts
- Deactivate Plugins:
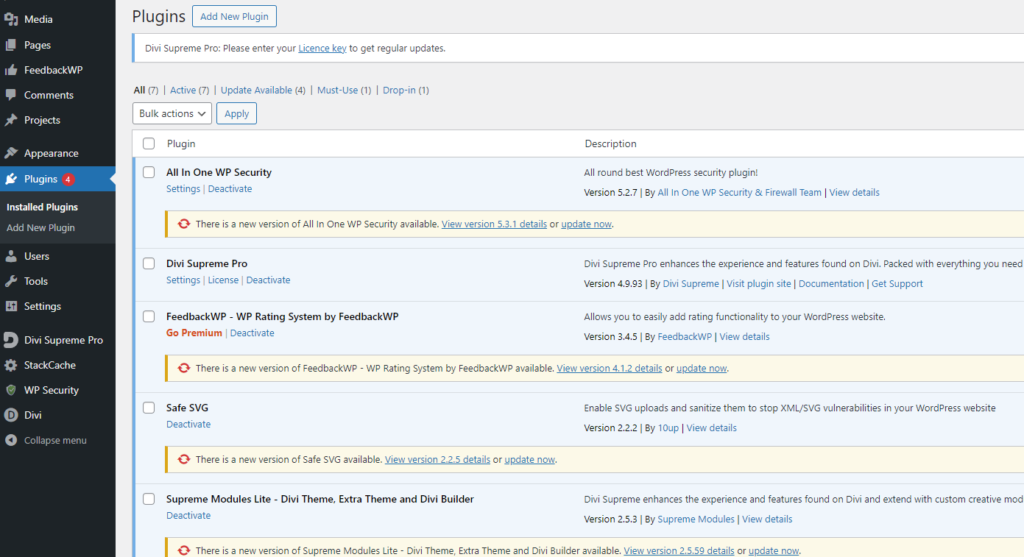
- Navigate to Plugins:
- Go to the WordPress dashboard and select “Plugins” > “Installed Plugins.”
- Deactivate All Plugins:
- Select all plugins and choose “Deactivate” from the bulk actions dropdown menu. Click “Apply.”
- Check Your Site:
- See if the issue is resolved. If it is, a plugin is likely causing the problem.
- Navigate to Plugins:
- Reactivate Plugins:
- Reactivate One by One:
- Reactivate each plugin individually and check your site after each activation to identify which plugin is causing the issue.
- Reactivate One by One:
Switch to a Default Theme
- Activate Default Theme:
- Go to Themes:
- Navigate to “Appearance” > “Themes.”
- Choose a Default Theme:
- Activate a default WordPress theme such as Twenty Twenty-Three. This helps determine if the issue is related to your current theme.
- Go to Themes:

- Check Your Site:
- Evaluate:
- Check if the issue persists with the default theme. If the issue is resolved, your original theme may be causing the problem.
- Evaluate:
Increase PHP Memory Limit
- Edit wp-config.php:
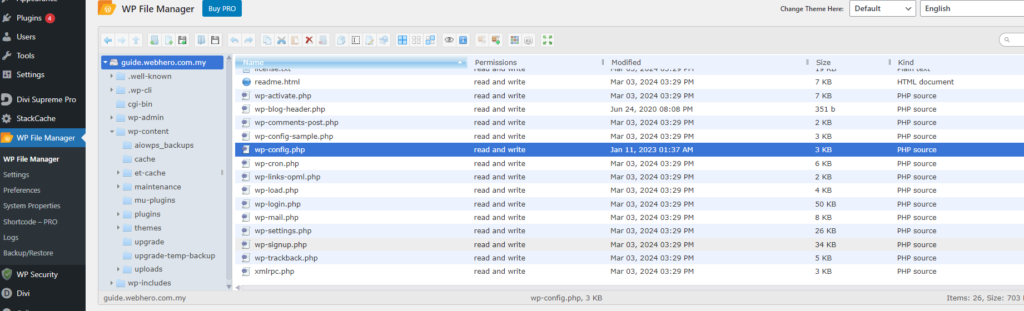
- Access Site Files:
- Use FTP or your hosting control panel to access your WordPress files.
- Open wp-config.php:
- Locate and open the wp-config.php file for editing.
- Access Site Files:
- Add Memory Limit Code:
- Insert Code: Add the following line before “/* That’s all, stop editing! Happy publishing. */”: define(‘WP_MEMORY_LIMIT’, ‘256M’);

- Save Changes:
- Save and upload the file back to your server.
- Check Your Site:
- Verify:
- Refresh your site and check if the issue is resolved.
- Verify:
Check File Permissions
- Verify File Permissions:
- Access via FTP:
- Use FTP or your hosting control panel to navigate to your WordPress installation directory.
- Check Permissions:
- Ensure files are set to 644 and directories are set to 755. Adjust permissions if necessary.
- Access via FTP:
- Correct Permissions:
- Modify Permissions:
- Right-click on files or directories, choose “File Permissions,” and set the appropriate permissions.
- Modify Permissions:
Repair the Database
- Enable Database Repair:
- Edit wp-config.php:
- Open the wp-config.php file and add this line: php Copy code define(‘WP_ALLOW_REPAIR’, true);
- Edit wp-config.php:
- Run Database Repair:
- Visit Repair Page:
- Go to http://yourdomain.com/wp-admin/maint/repair.php in your browser.
- Repair and Optimize:
- Click “Repair Database” or “Repair and Optimize Database” as needed.
- Visit Repair Page:
- Remove Repair Code:
- Edit wp-config.php Again:
- Remove the line added previously and save the file.
- Edit wp-config.php Again:
Check for .htaccess Issues
- Rename .htaccess File:
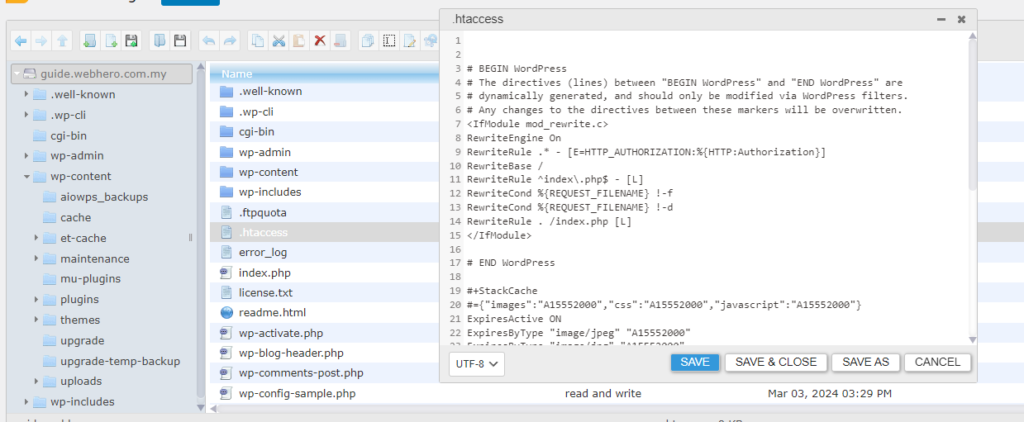
- Access via FTP:
- Use FTP or your hosting control panel to locate the .htaccess file in your WordPress root directory.
- Rename File:
- Rename it to .htaccess_old or similar.
- Access via FTP:
- Regenerate .htaccess:
- Update Permalinks:
- Go to “Settings” > “Permalinks” in the WordPress dashboard.
- Save Changes:
- Click “Save Changes” to regenerate a new .htaccess file.
- Update Permalinks:
- Check Your Site:
- Verify:
- See if the issue is resolved. If so, there may have been a problem with the old .htaccess file.
- Verify: