Although it is not recommended, we will show you how you can use Gmail as an email client.
Why is it not recommended?
- Gmail might scan your email for advertising purposes. If it is a confidential info, your company might not like it.
- Confusing mobile client setup.
- Harder for us to troubleshoot when problem arises.
How to Set up Gmail as Email Client
Step 1: Login to Gmail
Login to your Gmail account.
Step 2: Configure
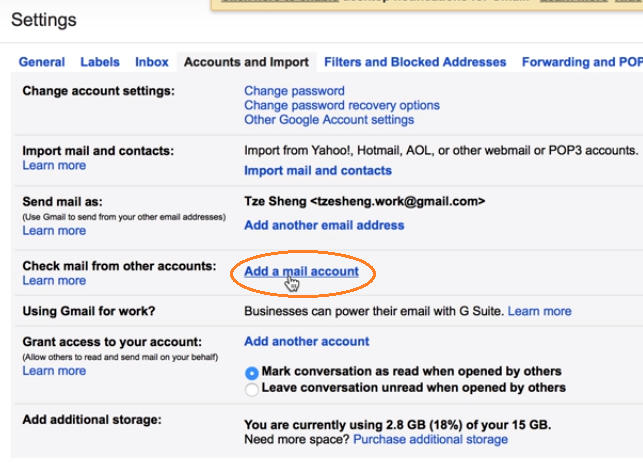
Go to Settings > Accounts and Imports > Click Add a mail account.
Type in your email address. Click Next.
On the next screen, choose Import emails from my other account (POP3). Click Next.
Enter the email settings.
- For username, use the email address provided.
- Use the password provided.
- POP Server: mail.yourdomain.com or exactly as how it is given to you (Incoming Server)
- Port: Use the number that was given to you. Or in your cPanel, check the POP3 Port (usually it’s 995) of the Secure SSL/TLS Settings. You may also use Non-SSL Settings (POP3 Port: 110), but it is not recommended.
- Tick:
- Leave a copy of retrieved message on the server
- Always use a secure connection (SSL) when retrieving mail.
- Label incoming messages
An example of correct settings is shown as below:
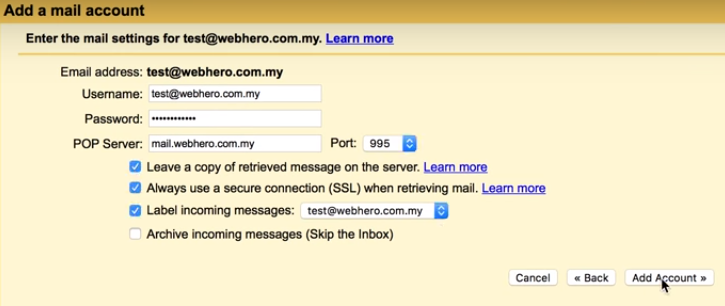
Once done, click Add Account.
When your mail account has been added, you will be asked to send mail as your email. Just tick Yes, I want to be able to send mail as [email protected].
Then Click Next.
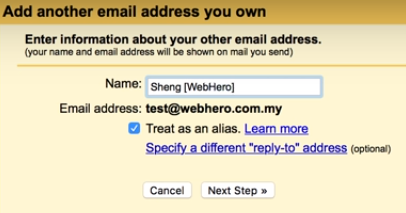
Step 3: Enter Information
Enter the email information (name) you want your recipients to see.
Tick Treat as an alias.
Then click Next Step.
Step 4: Configure mail to be sent
Enter the email settings that has been provided to you.
- SMTP Server: This is the Outgoing Server. Enter the exact address that is given to you. Usually it is mail.yourdomain.com. But it can be different to some companies. So double check the details.
- Port: 465 (or exactly as it is given to you)
- Username: your email address
- Use the password provided
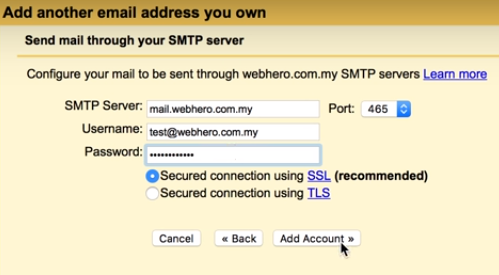
Then click Add Account.
Step 5: Verify
Gmail will send a confirmation code to your email. Login to your WebMail (go to webmail.yourdomain.com) and check your inbox. It may take a few minutes to receive the email.
You will receive instructions on how to verify your email. You may click the verification link or use the verification code.
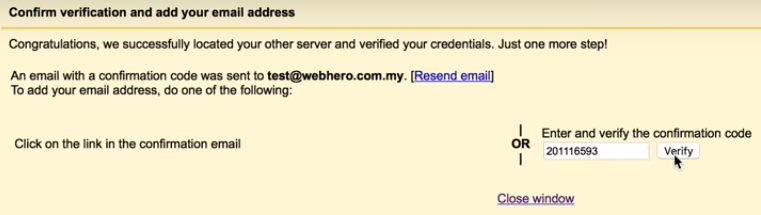
You may see an error after verifying. Don’t worry. It will just take a little time for this thing to work.
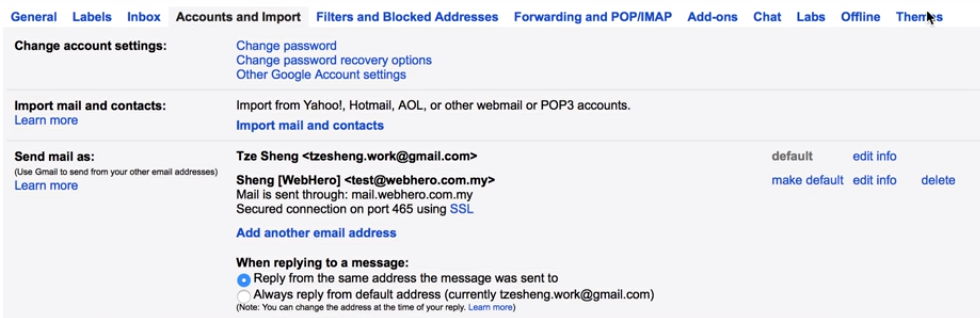
When you go back to your Settings > Accounts and Import, you will be able to see that the new email account has been added.