First you have to Download Thunderbird client here. Then install it. Once you have it installed, open the Thunderbird client. And the next thing we do is to set up the client.
Setting Up the Thunderbird Email Client
If it’s your first time to launch the email client, you will be asked if you would like a new email address. Just click Skip and Use My Existing Account.
A Mail Account Setup box will pop up, with this, you will be able to setup a new account.
Step 1: Create a New Account
1. Input your name. You may choose a name according to your preferences. But we would encourage and suggest to put your name and company name (e.g. Name [Company]) for easier identification and more professional approach.
2. Input the credentials provided to you: Email and Password.
Tip: If you are copying your password from a source (a notepad or something), make sure you copy only the exact password. Be careful that there are times when an empty space is also copied.
3. Click Continue.
Step 2: Configure Account
Once you click continue, configuration is automatically detected at the email provider.
If you see this kind of setup:
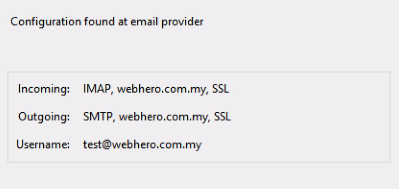
Click Done. And you’re good to go.
If not, click Manual Config.
Step 2.1: Manual Configuration
Incoming
- Select IMAP
- Server hostname: copy and paste the incoming server url that is provided to you.
- Set the Port to 993.
- SSL: Select SSL/TLS
- Authentication: Normal Password or Autodetect
Outgoing
- Server hostname: same as the incoming.
- Set the Port to 465
- SSL: Select SSL/TLS
- Authentication: Normal Password or Autodetect
Username
Incoming/Outgoing
- Should be your full email address

Step 3: Re-test and Done
Once you have already set up the manual configuration, click Re-test and see if it’s okay. Then click Done.